Help Article
Security > Users, Roles, & Subscriptions

Who can use this feature?
By default, Admin users with Security role permissions
Purpose
From the Admin module, you can manage your firm’s MetaField users, roles, and subscriptions. Each of these has its own dedicated page in the Security section.

Users Page
The Users Page allows you to add and manage your firm’s MetaField users.
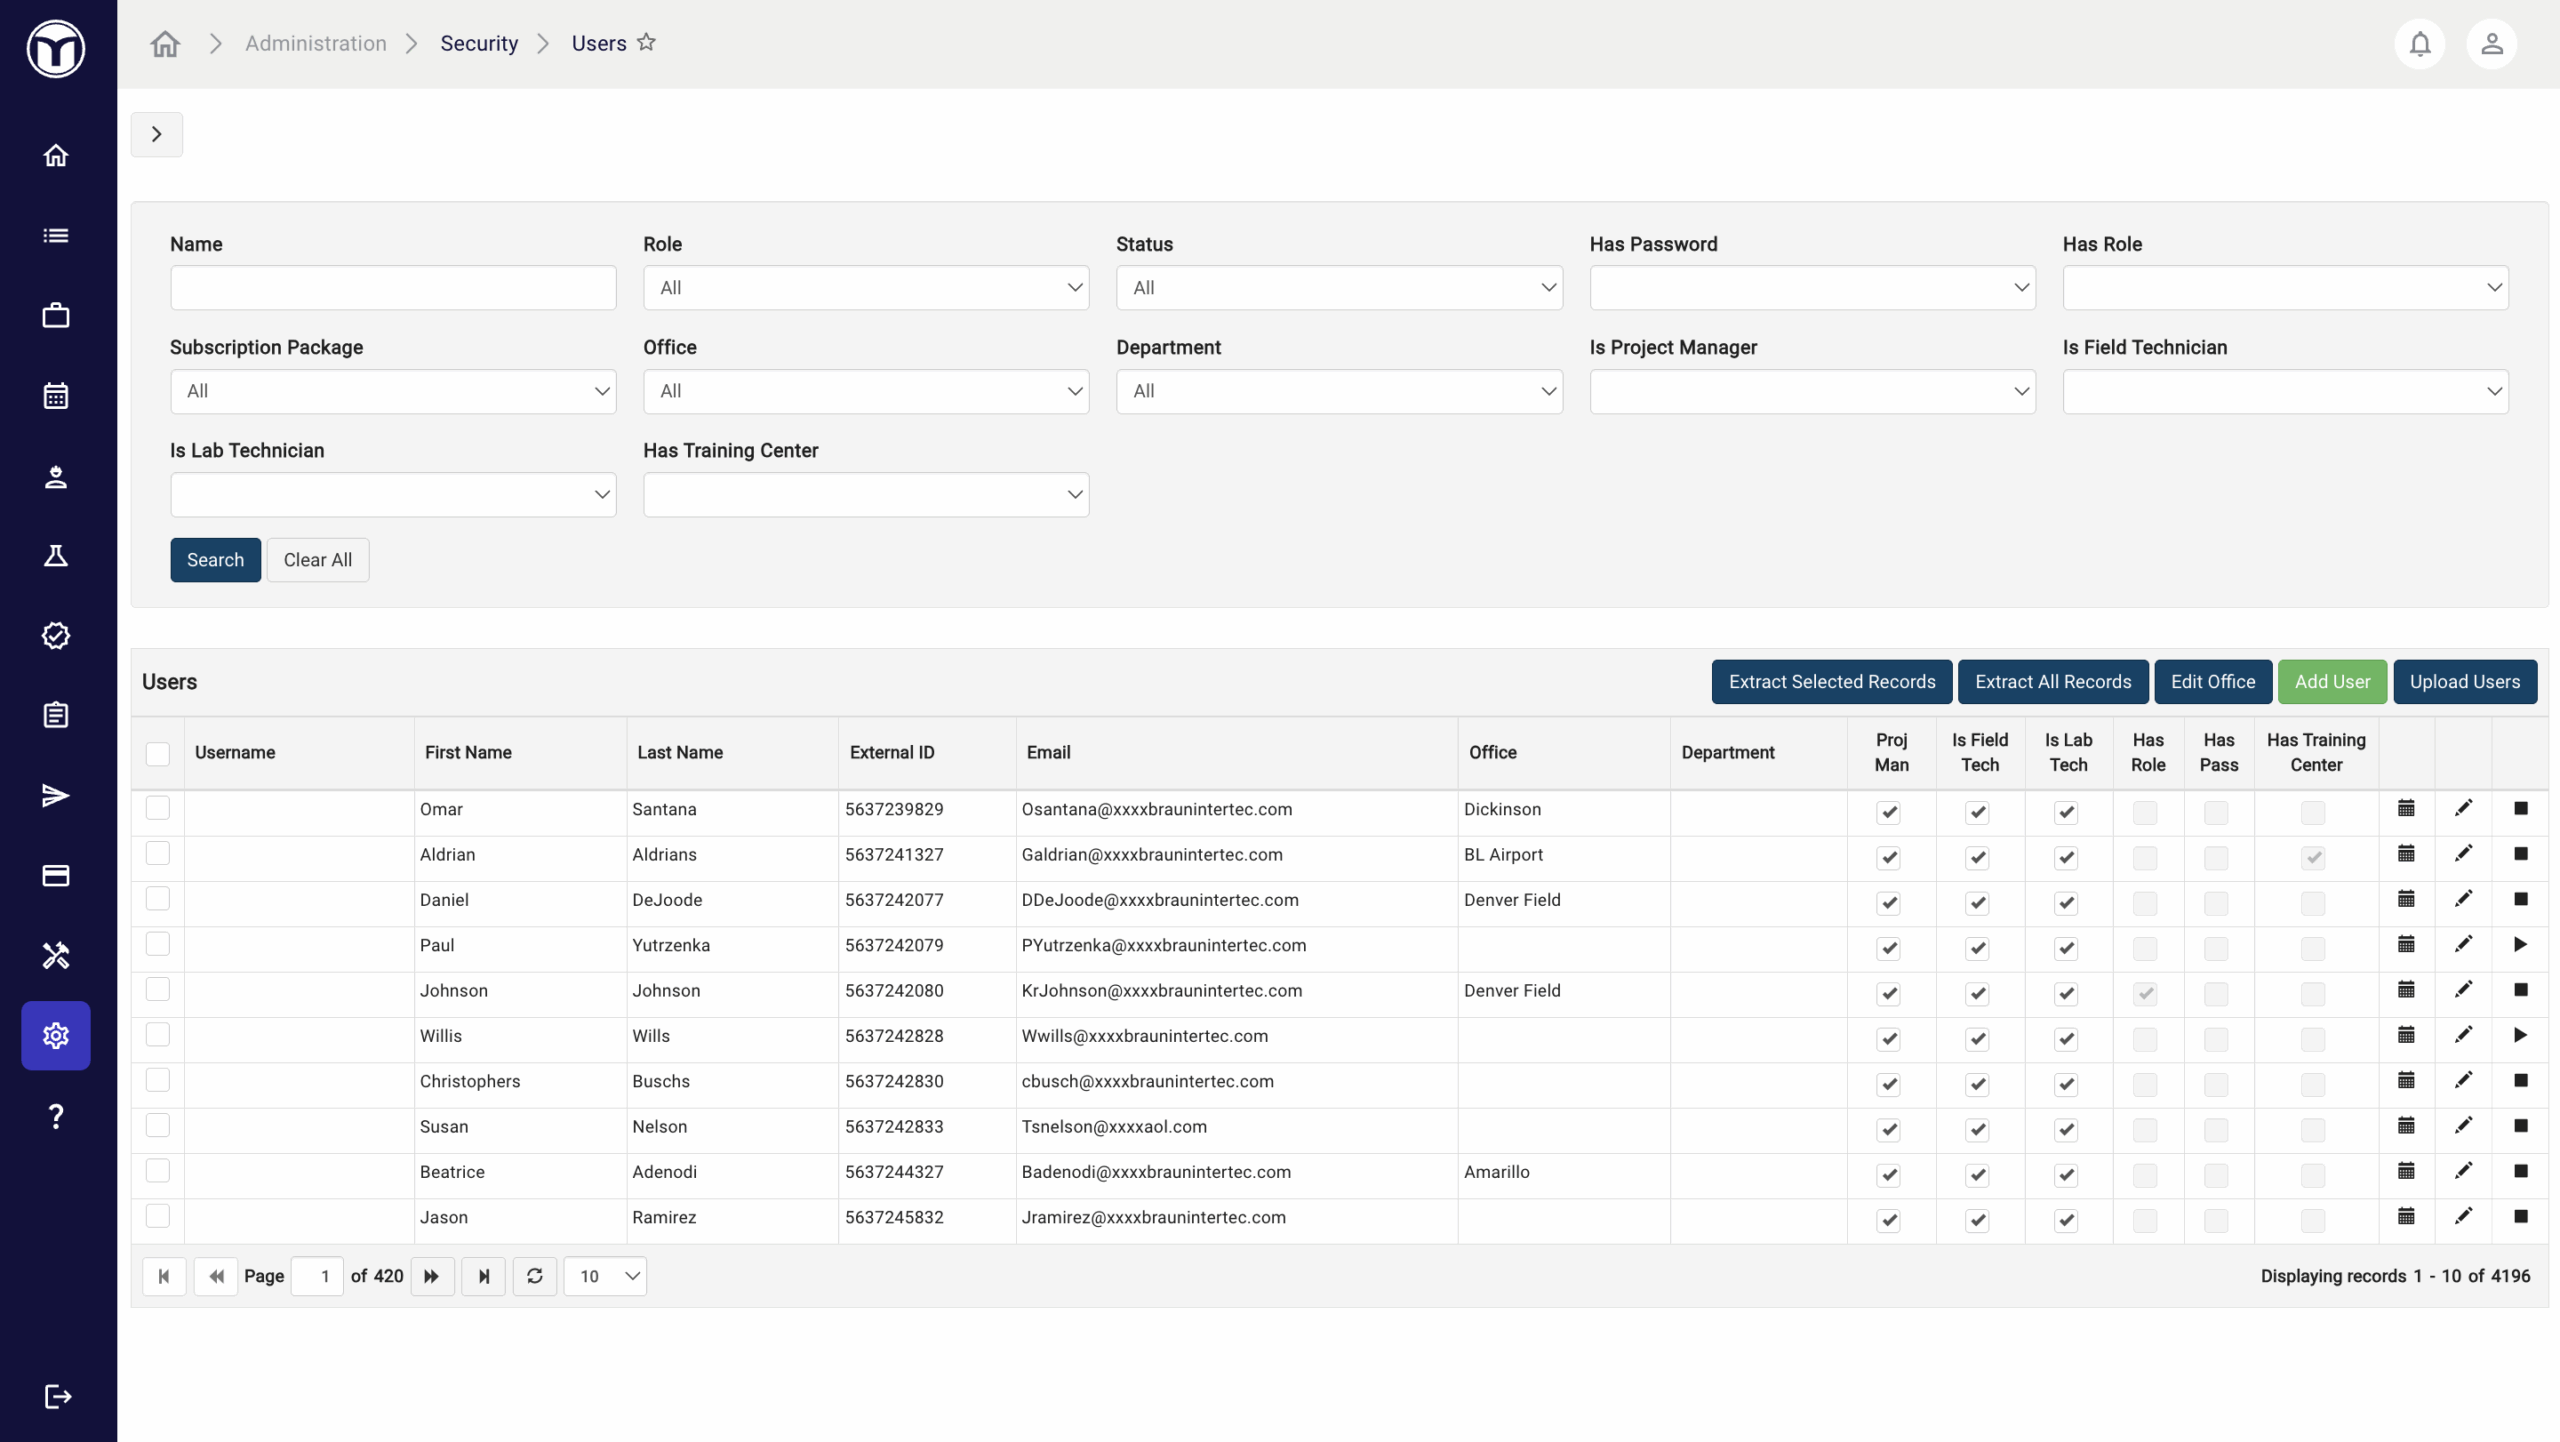
Available actions:
- Add or upload new MetaField users
- Edit a user’s info, including role, assigned office, project access, and digital signature
- Extract user records as .CSV files
Adding Users: What to Expect
To add a new user, press the Add User button. A form will open allowing you to add user details across these tabs:

General Info: Enter the user’s basic profile information, such as username, login password, contact info, access to MetaField Training Center, etc.
Roles: Assign one or multiple roles to the user. A user’s role determines which actions and areas they can use in MetaField. Users must be assigned at least one role to use MetaField.
Subscription History: This tab shows you the history of this user, including which permissions were activated or deactivated for them and when.
Project Access: Use this tab to limit the user’s access to specific projects as needed. Add any project to the list via Project Number – then check the "Is Restricted to Projects Below" checkbox.
Signatures: Use this tab to set the user’s digital signature settings.
Once you’ve completed all required fields in each tab, press Save. Once saved, new users can be accessed and managed from the Users table.
Editing & Managing Users
Use these commands to manage your list of MetaField users:
- Extract Selected/All Records: Downloads a .CSV file of chosen user records
- Edit Office: Assign selected user(s) to a new office
- Add User: Create a new MetaField user
- Upload Users: Import a list of users via by uploading a .CSV file
The buttons located on the far-right of each user record allow you to perform quick actions, including:
- History (🗓️): View history of the user (creator, creation date, etc.)
- Edit (✏️): Edit user information
- Deactivate (◼️): Deactivate the user
- Activate (▶️): Activate the user

Filtering Users by Role & Settings
From the Users table, you can check or uncheck role settings like ’Is Field Tech’ or ‘Is Lab Tech‘. This allows you to associate the user with one or several of the user filters at the top of the page.
You can also filter users by whether they have a password, a role, or access to MetaField Training Center. These filters allow you to quickly sort to specific groups of users.

Roles Page
MetaField uses role-based security. This means that a user’s assigned role determines which permissions they have. As an Administrator, you can create roles with various permissions – and assign those roles to users based on what activities they need to perform. Creating and assigning roles allow you to control what each user can see and do in the app.
Roles can be created or edited from the Roles Page. Once saved, these roles can be assigned to individual users from the Users page (see above). Remember, users must be assigned at least one role to access MetaField.
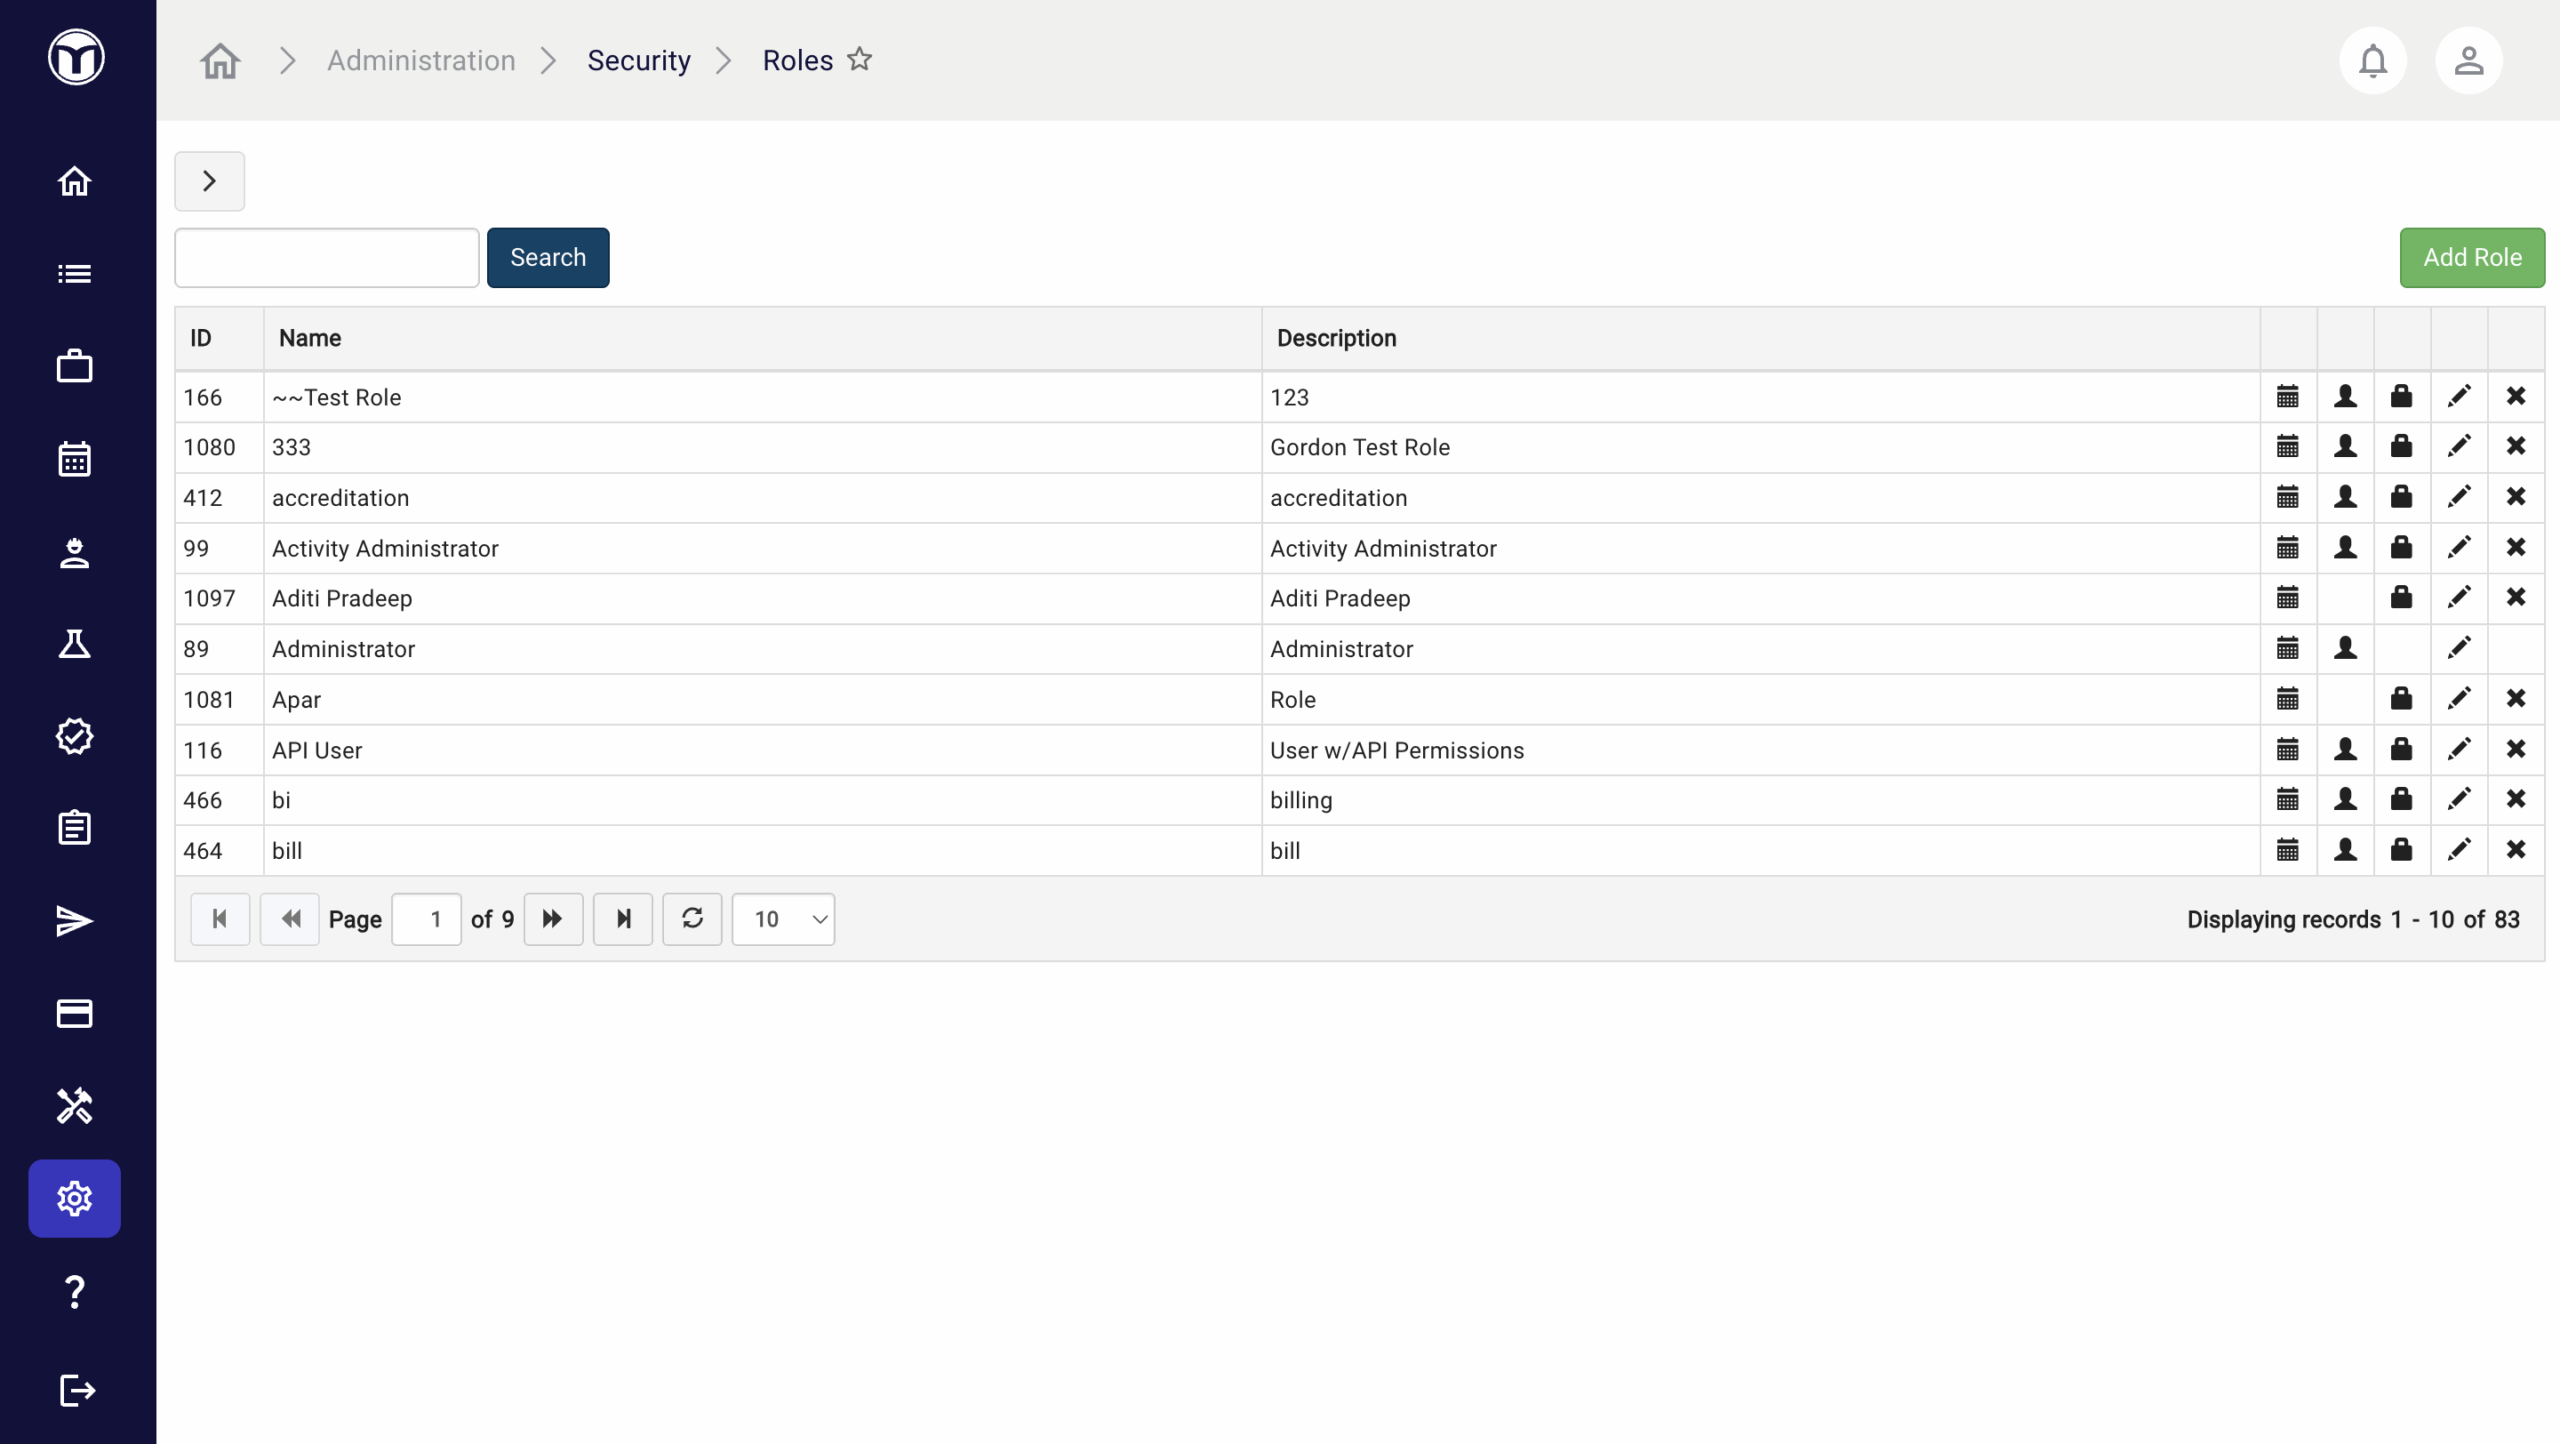
Available actions:
- Create new roles with assigned permissions
- Edit existing roles and reassign their permissions
- View all users assigned to each role
Adding New Roles: What to Expect
- Press the Add Role button
- Name and add a description for the role, then press Save
- Find or search for your new role using the Search bar
- Press the Reassign Permissions button (🔒)

5. Use the Permissions form to select which permissions you’d like to tie to the role. For example, you might give a new Field role access to some or all Field permissions.

Many permissions contain one or more ”sub-permissions”. These allow you to limit your roles to a specific list of functions. For example, say you wanted to give a user access to the Schedule module, but limit their ability to schedule or edit work orders. You could configure a custom role like this:

Users assigned to this example role can access Schedule, but cannot create/modify the schedule or import work orders.
6. Once you’ve configured permissions for your role, press the Save button. You can now assign this role to any user from the Users page.
Managing & Editing Existing Roles
The buttons located on the far-right of each role allow you to perform various quick actions, including:
- History (🗓️): View history of the role (creator, creation date, etc.)
- View Users (👤): View a list of all users assigned to the role
- Reassign Permissions (🔒): Reassign permissions for the role
- Edit (️✏️): Edit role info and details
- Delete (✖): Delete the role

Subscriptions Page
The Subscriptions Page lets you view all users with assigned roles for a given subscription month. Its purpose is to help you understand which and how many users are assigned to each Subscription Package.

- Subscription Packages are sub-groups of users that have access to various areas of MetaField. Subscription counts will be shown for each Subscription Package for the selected month / year. Clicking on a Subscription Package name will filter the user grid below to only show users belonging to that subscription.
- The Create Billing Export button creates a spreadsheet (.CSV data file) of subscription info for the selected subscription period.
- It's smart to review your subscription list monthly and remove users who no longer require access to MetaField.
Please note: roles must be completely removed from the user prior to the first of each month to avoid a subscription cost.
Want to keep learning?
Click here for more how-to articles and MetaField guides. You can also access in-app guidance using the Help Desk!